
Secure your bond starts with understanding how common renting is in Australia. The ABS reported that 31.0% of households were renting in the 2021 Census, up from 29.4% in 2016, while the proportion of households with a mortgage fell from 35.0% to 32.8% over the same period, which underlines how many households go through move-out inspections and bond-return pressure (ABS rental market context cited here). That matters because an end of lease cleaning checklist isn't just a handy to-do list. It's part of a high-stakes handover process tied to real money and real disputes.
Australian rentals are inspected with a property manager's eye, not a tenant's eye. A place can feel clean and still fail on greasy rangehood filters, soap scum in shower corners, dusty skirting boards, or grime in window tracks. That's where many tenants come unstuck. They clean what they see at standing height and miss the edges, undersides, rails, frames, and appliance interiors that inspectors notice first.
This guide gives a practical, room-by-room end of lease cleaning checklist built around what commonly gets flagged. It also shows where DIY works, where it doesn't, and how to document the clean properly. For renters who want backup, Star Cleaner Australia can step in with reliable service, safety-checked operators, and a 100% satisfaction guarantee, but the checklist itself is useful whether the clean is done personally, split with housemates, or handed to professionals.
Table of Contents
- 1. The Room-by-Room General Clean
- 2. The Kitchen Deep Clean
- 3. Bathroom and Laundry Sanitisation
- 4. Wall and Door Mark Removal
- 5. Window and Blind Cleaning
- 6. Floor and Carpet Deep Clean
- 7. Outdoor Areas and Balcony Tidy
- 8. The Final Detail Check
- 9. Optional Professional Add-Ons
- 10. Final Documentation and Handover
- 10-Point End-of-Lease Cleaning Comparison
- Your Bond Back Guarantee Final Steps and When to Call the Pros
1. The Room-by-Room General Clean
The general clean is the pass that sets the standard for everything else. If dust is still sitting on door frames, light switches feel grimy, and cobwebs are hanging in corners, the rest of the property already looks neglected. Property managers notice consistency. A clean oven won't redeem dusty skirting boards in every bedroom.
Work top to bottom in each room. Ceiling fans, light fittings, vents, walls, switches, power points, door frames, built-ins, shelves, skirting boards, then floors. That sequence stops dust falling onto surfaces that have already been wiped.
What gets missed first
A lot of tenants wipe benches and bedside tables, then call the room done. Inspectors usually look wider than that.
- Light switches and power points: Fingerprints and grey edges stand out badly on white plates.
- Skirting boards and door frames: These collect settled dust and tell an inspector whether the clean was thorough.
- Ceiling corners and fan blades: Cobwebs and dust on high points make a room feel unfinished.
- Handles and touch points: Built-in wardrobe handles, cupboard knobs, and door handles should feel clean, not sticky.
Practical rule: Use a slightly damp microfibre cloth, not a dripping one. Too much water leaves marks on painted surfaces and swells timber trims.
For households dealing with dust sensitivity, the same top-down approach also helps reduce airborne particles during the final clean. Star Cleaner Australia often recommends methods similar to those outlined in this guide to allergy-friendly cleaning, especially when bedrooms and living rooms have heavy dust build-up from fans, fabric, and storage.
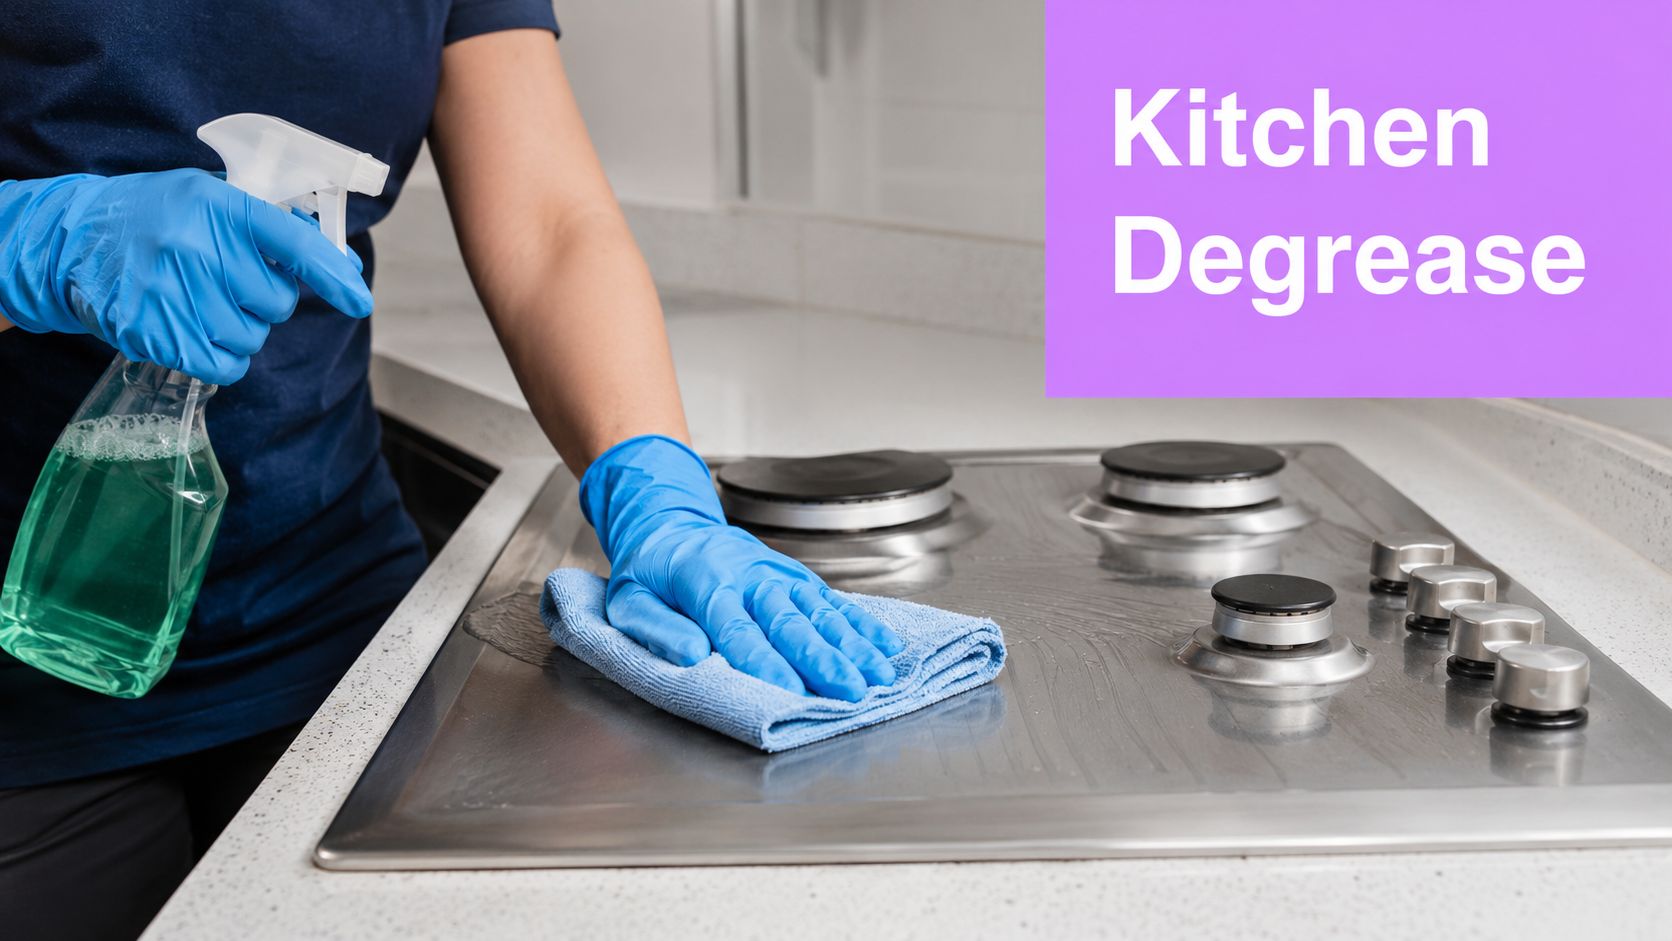
2. The Kitchen Deep Clean
Kitchens trigger more disputes than tenants expect because grease travels well beyond the obvious cooking zone. I see the same problem on vacate cleans every week. The benchtop looks fine, but the rangehood mesh is sticky, the tops of overhead cupboards are holding dust mixed with oil, and the oven frame is still dark around the edges.
That is why property managers judge this room hard. They are not only checking whether the kitchen looks presentable at eye level. They are checking whether grease, food residue, and odour have been removed from the places that show how the room was maintained.
In NSW, bond handling sits under the state tenancy system, and the rules around rental bonds are set out in the Residential Tenancies Act 2010 (NSW) and administered through NSW Fair Trading. With that much money tied to the final inspection, the kitchen needs a method, not a quick spray and wipe.
The surfaces that decide the result
Clear loose debris first. Crumbs in drawer runners, grit around kickboards, and dust on top of cupboards should come off dry before any chemical goes down. If you wet that mess first, it turns into paste and slows the whole job.
A proper kitchen clean covers the cooktop, control knobs, splashback, sink, taps, drain surround, bench edges, cupboard fronts, handles, kickboards, oven door glass, oven racks, trays, and rangehood filters. The trade-off is time. Tenants often spend twenty minutes polishing stainless steel and skip the oven cavity, but inspectors care more about grease build-up than shine.
Soak rangehood filters in hot water with degreaser before scrubbing. Clean them dry and you will smear grease into the mesh instead of lifting it out.
The oven is where many bond deductions start. The common miss is the inner lip around the frame, not the main glass panel. Another one is the hinge area, where baked-on residue sits out of sight until the door is opened. If the property manager opens the oven and gets a burnt smell or sees carbon on the racks, the kitchen reads as unfinished straight away.
Work like an inspector. Open every cupboard, run a finger along the top edge, check the sink overflow, and look up at the rangehood canopy. Then take clear photos once each zone is dry. That record helps if the agent raises a re-clean issue later.
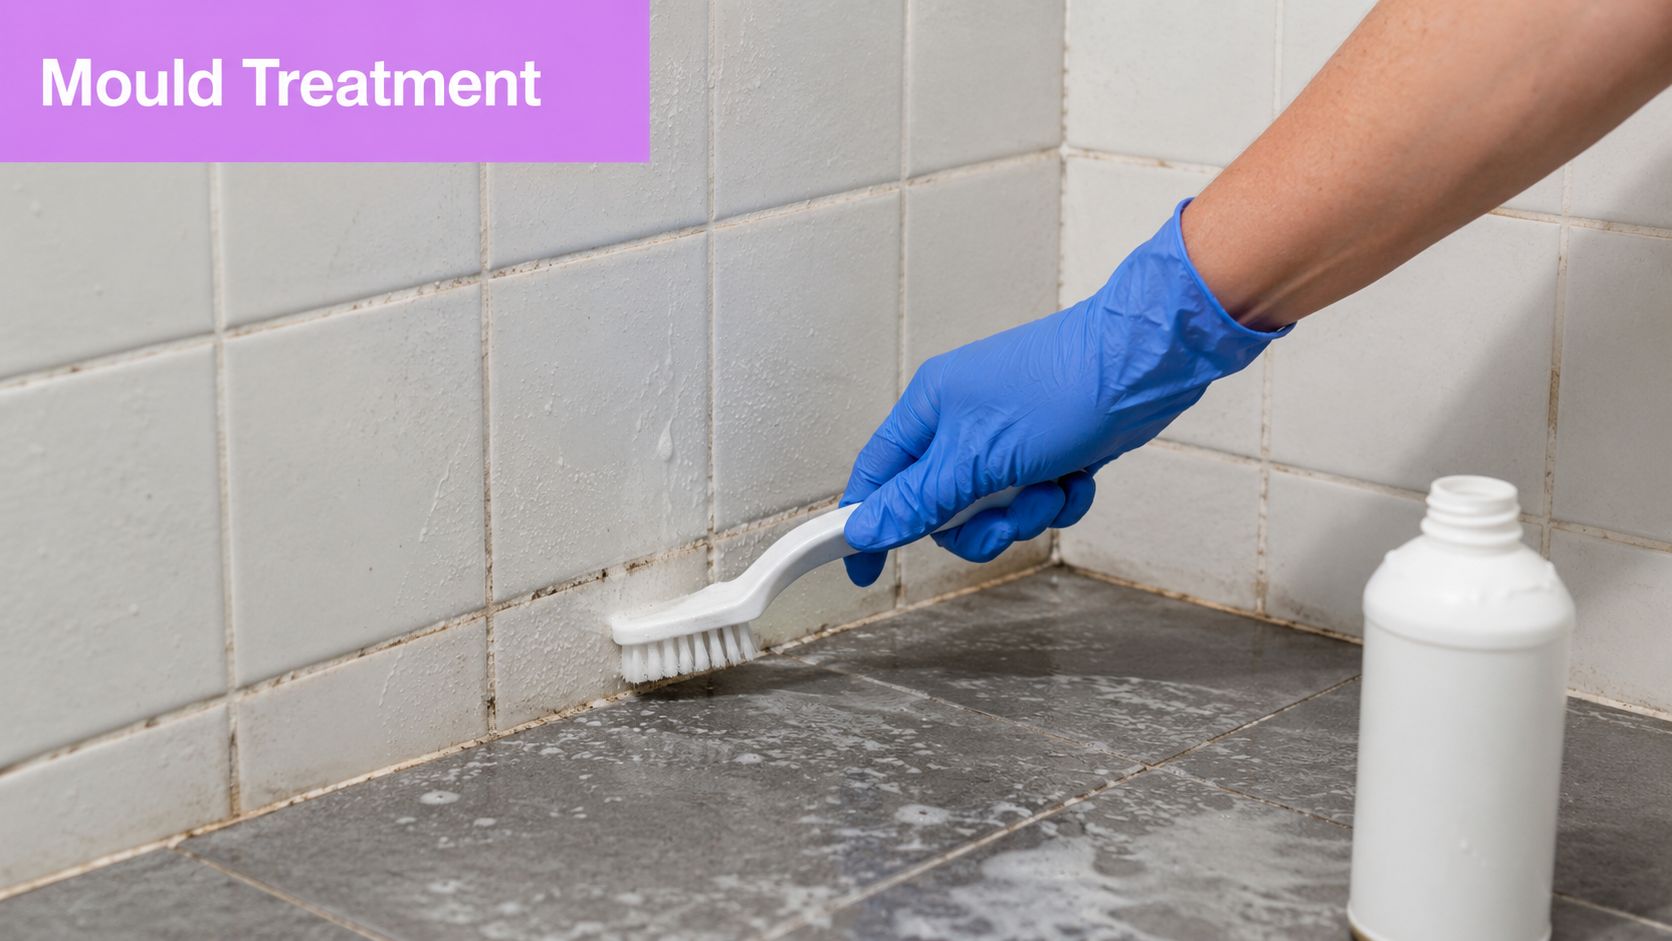
3. Bathroom and Laundry Sanitisation
Bathrooms and laundries decide a lot of bond outcomes because they show how the tenant handled hygiene over time, not just on the final day. Property managers look past shiny taps. They check for mould in silicone, scale around drains, dust on exhaust covers, and residue in corners that only shows up when the room is dry.
Use a work order that saves time and avoids redoing surfaces. Strip the room first. Remove bottles, bath mats, lint, hair, and anything sitting on ledges or behind the toilet. Then vacuum or dry-wipe dust, hair, and loose debris before applying product. If wet grime mixes with loose dust, it turns into sludge and gets pushed into grout lines, screen tracks, and tile edges.
What inspectors actually check in wet areas
The obvious surfaces matter. The hidden buildup is what usually triggers the re-clean.
- Shower screens and frames: Soap scum, hard water marks, and black residue in the bottom channel.
- Grout and silicone lines: Mould staining around the base, corners, and screen joins.
- Toilet pan, pedestal, and floor behind it: Urine splashback, dust, and grime around the S-bend and fixing points.
- Vanity cupboards and basin overflows: Toothpaste residue, hair, and product spills under the lip and around hinges.
- Laundry tub, drain surround, and tap bases: Detergent crust, lint, and grey residue around the waste and overflow.
- Exhaust fan cover and ceiling above the shower: Dust build-up and moisture staining that tells the agent the room was cleaned at eye level only.
Mould needs more than a quick bleach wipe. Bleach can fade the stain and leave the underlying growth in porous grout or silicone. Use a mould remover suited to wet areas, give it dwell time, and scrub with enough pressure to lift the contamination without shredding the grout line. If silicone is permanently blackened, cleaning may improve it but will not restore it. That is a maintenance issue, so document it clearly with photos.
Mirrors and shower glass are another trap. They often look fine front-on, then streak badly in side light during an inspection. Clean the glass wet, squeegee it off, then buff with a dry microfibre. Do the final check from the doorway and again near a window if there is one.
In laundries, open everything. Agents do. Check inside the tub cabinet, around the washing machine taps, under the lip of the sink, and along skirting where lint collects. If there is a floor waste, clean around it properly. A clean laundry smells neutral and looks dry.
Finish like a property manager would. Lift the toilet seat, check tap bases for white scale, run a finger along the exhaust cover, and photograph the shower screen, vanity, toilet area, and laundry tub once they are fully dry. That record matters if the agent claims mould, streaks, or missed detailing after handover.
4. Wall and Door Mark Removal
Walls create a tricky line between fair wear and tear and cleanable mess. Scuffs from bags, dark marks near handles, greasy fingerprints around switches, and grime on doors are often removable. Aggressive scrubbing, though, can burnish paint and make the wall look worse than the original mark.
The safe approach is test first, then clean lightly, then stop if the paint starts changing sheen. Matte paint shows rubbing fast. Low-sheen paint is slightly more forgiving, but it still marks if a magic eraser is used too hard.
What to treat and what to leave alone
Not every mark should be attacked. Some are damage. Some are wear. Some are paint that won't tolerate much cleaning.
- Cleanable marks: Fingerprints, light scuffs, dust lines, and splash marks around switches.
- Use caution on: Flat paint, patched areas, and older walls that may already have inconsistent finish.
- Document instead of scrubbing: Chips, dents, cracks, and stains that were there at move-in or that won't lift without damaging paint.
A mild sugar soap solution works well on many painted doors, trims, and washable walls. Greasy spots near kitchen entries often respond to diluted dish soap and warm water. The cloth should be wrung out properly. Wet walls can leave drip marks and swollen plaster joins.
The cleanest-looking wall isn't always the one that was scrubbed hardest. It's the one that still has an even finish after the mark is removed.
A common hallway scenario proves the point. Tenants often focus on the lounge room walls and miss the thin black shoulder-height marks along narrow corridors. Inspectors don't. They walk those spaces slowly because traffic marks build up there first.
5. Window and Blind Cleaning
Clean glass changes the whole feel of a property. It pulls in more light, makes empty rooms look sharper, and shows attention to detail. Dirty tracks and dusty blinds do the opposite. They make an otherwise decent clean feel rushed.
Windows should be handled in stages. Dust the frame and tracks first, vacuum loose grit, wipe the frame, then clean the glass. If the glass is cleaned first, dirt from the track usually ends up back on the pane.
The inspection points that matter
Property managers often run a finger through tracks and along blind slats because these areas are easy to overlook. They also stand sideways to the glass to check for streaking.
Venetian blinds need a methodical wipe on both angles. Roller blinds usually need dusting and spot treatment rather than soaking. Sliding door rails need more than a quick sweep. Built-up dirt often packs into the corners and wheel channels.
For high or awkward external panes, professional help is often the safer call. Star Cleaner Australia offers add-on window cleaning through safety-checked operators, which is useful when second-storey access, fixed screens, or narrow exterior paths make DIY cleaning risky. The value isn't just appearance. It's reducing the chance of falls, broken fittings, or half-cleaned exterior glass before inspection.
Clean on an overcast day if possible. Hot sun dries product too quickly and leaves drag marks. A squeegee on larger panes usually gives the neatest finish, while a vacuum brush attachment helps remove blind dust before wiping starts.
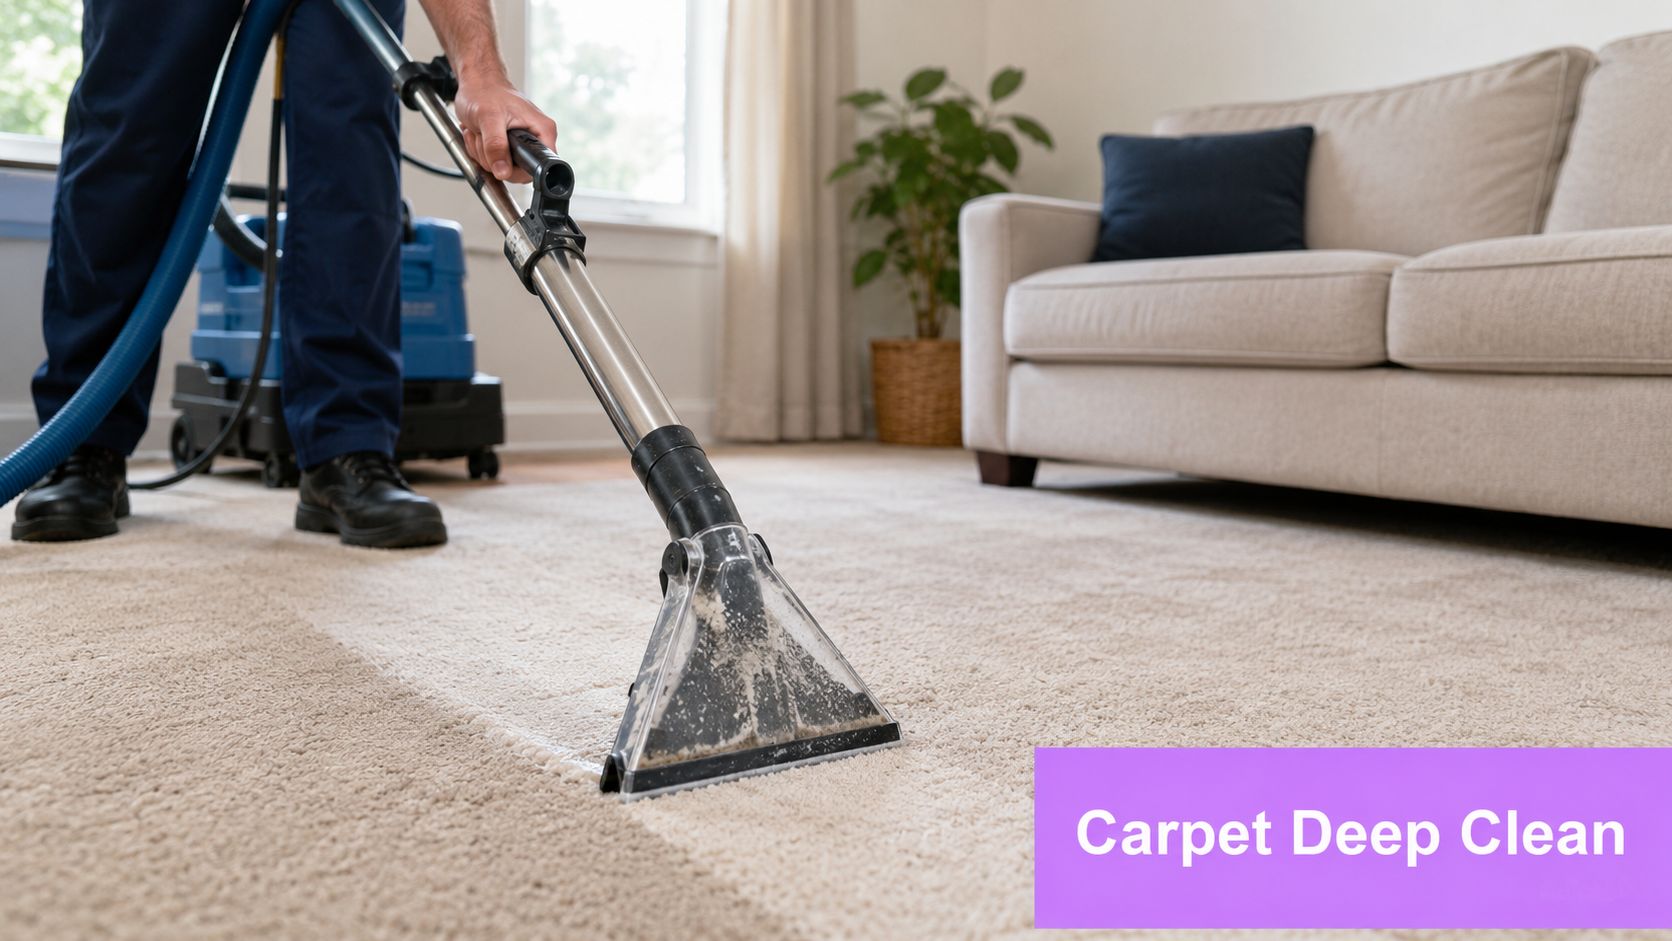
6. Floor and Carpet Deep Clean
Floors are one of the last areas an inspector sees up close, and they shape the overall impression fast. A clean kitchen or bathroom loses impact if the carpet edges are furry with dust or the tiles still show shoe marks. Leave floors until the end, after the high dust work is finished.
Property managers rarely inspect the middle of the room for long. They check the perimeter. That means skirting lines, corners, wardrobe tracks, behind doors, under beds if any furniture remains, and the strip where carpet meets the wall. Those are the spots that tell them whether the clean was careful or rushed.
What actually works on flooring
Hard floors and carpets need different methods because they fail for different reasons. Hard floors usually get picked up for residue, sticky patches, dull mop marks, and grit left in corners. Carpets fail on odour, visible staining, pet hair, and flattened debris lodged along edges.
Use a simple sequence that matches how inspections happen:
- Vacuum the perimeter first: Use the crevice tool along skirtings, in corners, inside wardrobes, and around door stops before doing the open floor area.
- Treat stains before the final clean: Food spills, makeup, coffee, and tracked-in marks need dwell time. If you leave them until the end, they often set or wick back after drying.
- Match the product to the surface: Too much water can swell laminate, haze timber, and leave dirty grout lines on tile. A lightly damp microfibre mop is usually safer than a soaking wet string mop.
- Check sliding door rails and thresholds separately: They collect black grit that a standard mop passes over.
- Keep receipts for carpet cleaning: Many agencies ask for proof when the lease or condition report notes professional carpet cleaning, pets, or heavy traffic areas.
One of the most common misses I see is a tenant who vacuums the centre of the bedroom well, then leaves a grey line around the edges. Another is mopping tiled floors with dirty water and pushing that slurry into the grout near the wall. Inspectors notice both because they kneel, open cupboards, and look down the edges, not just across the room.
Carpet cleaning also involves a trade-off. DIY machines can freshen light soil, but they often leave carpets too wet or fail to remove older stains. For units with pet odour, traffic lanes, or obvious spotting, a professional extraction clean is usually the safer choice, especially if the entry condition report shows the carpet was professionally cleaned at the start of the tenancy.
Before photos help here. Take clear shots of stain treatment, finished carpet lines, and clean floor edges near wardrobes, balconies, and sliding doors. If there is a later dispute, those images do more than a general room photo ever will.
7. Outdoor Areas and Balcony Tidy
Outdoor areas often get left to the final hour, then rushed. That's a mistake. A neat interior loses impact if the balcony has leaf build-up, the patio has cobwebs, or the garage floor still shows dust, oil, and rubbish.
The exterior should be treated as part of the premises, not an optional extra. Sweep first, remove rubbish, clear drains, wipe outdoor rails, and check corners for webs and wind-blown debris. If the tenancy included garden upkeep, lawns and beds need to look maintained rather than abandoned.
What gives outdoor neglect away
Balconies and courtyards fail inspections for simple reasons. Dirt piles up where walls meet the floor. Pots leave ring marks. Dead leaves collect behind outdoor units and in corners. Garage floors hold cardboard dust, sawdust, and old spill marks long after everything else has been moved out.
A pressure hose can help on concrete and pavers, but it isn't always the right answer. Some balconies have drainage limits, strata restrictions, or neighbouring areas below that make heavy water use impractical. In those cases, sweeping, spot scrubbing, and controlled mopping are safer.
Check the perimeter before key handover. Side gates, bin areas, and the strip beside the letterbox are easy to forget and easy to fail.
One common scenario is a renter who clears the courtyard but leaves the outdoor bin dirty and half open. Another is a spotless garage with a few screws, paint flakes, or cable ties still along the wall. Small rubbish reads as unfinished work, especially outdoors where inspectors expect the area to be empty and presentation-ready.
8. The Final Detail Check
Most end of lease cleaning checklists fall apart at the final check because people stop when the place looks clean from the doorway. Inspections aren't done from the doorway. Cupboards get opened. Doors get moved. Ovens get lit up. Tracks get touched.
The best final check is slow and a bit ruthless. Open everything. Kneel down. Use a torch. Look from high and low angles. Daylight reveals streaks on glass and splash marks on stainless steel that room lighting hides.
Think like the property manager
A final pass should include inside cupboards, wardrobe shelves, appliance seals, laundry tubs, skirting corners, sliding rails, tops of doors, and the upper edges of splashbacks. If the cleaner wouldn't be comfortable seeing a finger run across it, it isn't finished.
A property can be empty and still not be inspection-ready. Empty just makes the missed details easier to see.
This is also the point where common self-inflicted mistakes get caught. Wet floors walked on too soon. Spray residue left on black tapware. Crumbs in cutlery drawers after the last snack before departure. For a useful refresher on the kinds of oversights that keep showing up in Australian homes, Star Cleaner Australia's guide to common cleaning mistakes Australians make is worth reviewing before the final lock-up.
A practical example is the top of the fridge recess. Once the fridge is removed, the dust line is obvious. The same goes for the underside of the rangehood lip, the inner rubber fold on a washing machine, and the sliding door rail behind the fixed panel.
9. Optional Professional Add-Ons
Some jobs are straightforward DIY work. Others are time-heavy, equipment-heavy, or easy to get wrong. The smart move isn't doing everything personally. It's deciding which tasks are worth outsourcing so the overall handover meets inspection standard.
Professional add-ons are most useful where the result needs specialist tools, extra labour, or a reliable receipt. Carpet extraction, oven detailing, external window cleaning, high-set cobweb removal, and stubborn bathroom restoration all fall into that category.
Where a pro usually earns the fee
Tenants often spend hours on one oven and still leave carbon around hinges and door glass edges. They hire a machine for the carpet but can't extract enough moisture, so the room smells damp the next day. They climb a ladder to clean outside glass and still leave frames dusty. These are classic examples of effort without a strong result.
Star Cleaner Australia is a practical option when the handover needs dependable execution rather than guesswork. The service is built around reliability, safety-checked operators, and a 100% satisfaction guarantee, which matters when the property manager's standard is tighter than expected. For renters who want to hand the heavy work to one provider, the company's residential cleaning services can incorporate end-of-lease add-ons.
- Book the hard jobs first: Ovens, carpets, and windows are the tasks most likely to blow out the schedule.
- Use one provider where possible: Fewer bookings usually means fewer delays and fewer gaps in accountability.
- Keep the light work for last: After pros finish, the tenant can still handle final dust touch-ups and documentation.
The goal isn't to outsource everything. It's to put specialist work in the hands of people who can complete it safely and properly.
10. Final Documentation and Handover
Cleaning protects the bond. Documentation protects the cleaner. Once the property is empty and fully finished, every room should be photographed carefully, including cupboards, drawers, appliances, bathroom fixtures, and outdoor areas. Video is useful too, especially for showing condition continuously rather than in selected stills.
Organisation matters here. Random photos mixed through a phone gallery are hard to use in a dispute. Room-by-room folders are much easier to send, store, and retrieve if the property manager raises a concern later.
What to record before returning keys
The strongest handover record is clear, boring, and complete. It should show that the premises were clean, empty, and ready for inspection at a specific point in time.
- Photograph whole rooms first: Then capture close-ups of the oven, shower, basin, inside cupboards, and tracks.
- Include problem areas: If a stain, crack, or chip was pre-existing, document it clearly rather than hoping it won't come up.
- Keep receipts together: Professional carpet cleaning, add-on services, or supplies should sit in one folder with the photos.
- Send a clean handover email: State that the property is ready for inspection and that a full photographic record is available.
A practical scenario proves why this matters. If a property manager later says the oven was left dirty, a timestamped set of close-up images showing the racks, trays, glass, seals, and floor of the oven can settle the issue quickly. The same applies to window tracks, mould-prone bathroom corners, and garage floors.
10-Point End-of-Lease Cleaning Comparison
| Task | Implementation complexity | Resources required | Expected outcomes | Ideal use cases | Key advantage |
|---|---|---|---|---|---|
| The Room-by-Room General Clean | Low–Medium | Microfibre cloths, duster, all-purpose cleaner, ladder | Consistent surface cleanliness and reduced dust/cobwebs | Pre-inspection prep, routine turnover | Sets a positive inspection impression across all rooms |
| The Kitchen Deep Clean | High | Degreaser, oven cleaner, non-scratch scourers, gloves, time | Grease-free surfaces, sanitized food areas, fewer inspection flags | End-of-lease, heavily used kitchens | Removes health/inspection red flags from food prep zones |
| Bathroom and Laundry Sanitisation | High | Disinfectants, mould remover, brushes, squeegee, ventilation | Hygienic, mould-free bathrooms and streak-free fixtures | Mould-prone properties, end-of-lease hygiene checks | Addresses hygiene risks and mould recurrence |
| Wall and Door Mark Removal | Low–Medium | Sugar soap or eraser, soft cloths, touch-up paint | Reduced scuffs and visible marks, improved aesthetics | High-traffic hallways, bond protection | Prevents deductions for excessive wall damage |
| Window and Blind Cleaning | Medium | Squeegee, glass cleaner, ladder or pro window service, vacuum | Streak-free glass, brighter interiors, clean blinds and tracks | Final presentation, properties with large or high windows | Enhances natural light and overall presentation |
| Floor and Carpet Deep Clean | Medium–High | Vacuum, mop, surface-specific cleaners, professional steam clean | Deep-cleaned carpets, stain reduction, allergen removal | Pet homes, long tenancies, lease-required cleaning | Removes deep-seated dirt; often required by leases |
| Outdoor Areas and Balcony Tidy | Medium | Broom, pressure washer, mower, weed tools, time | Tidy exterior, removed debris and stains, improved curb appeal | Balconies, patios, garages, gardened properties | Demonstrates whole-property care and reduces exterior deductions |
| The Final Detail Check | Low | Torch, checklist, camera, small cleaning supplies | Catches missed spots, increases chance of inspection pass | Immediately before inspection/handover | Ensures completeness and avoids avoidable fails |
| Optional Professional Add-Ons | Variable | Budget, bookings with vetted professionals, specialist equipment | High-standard results for intensive tasks | Oven restoration, professional carpet/window/pressure cleaning | Saves time and guarantees specialist-quality results |
| Final Documentation and Handover | Low | Camera/phone, receipts, organised folders, email | Time-stamped evidence and smoother dispute resolution | End-of-lease handover and bond claims | Provides proof of condition to protect tenant interests |
Your Bond Back Guarantee Final Steps and When to Call the Pros
A strong end of lease cleaning checklist works because it mirrors the way a property manager inspects. It doesn't stop at obvious surfaces. It goes after residue in the oven, grime in tracks, marks on doors, dust on skirtings, mould in wet areas, and debris in outdoor corners. That's the difference between a property that looks fine at a glance and one that stands up to scrutiny.
The biggest mistake tenants make is treating the clean like ordinary weekly housework. End-of-lease cleaning is more detailed, more systematic, and more document-heavy. It needs the property empty first. It needs a top-to-bottom order. It needs a final inspection pass with a torch and the mindset of someone trying to find faults. And it needs proof, because even a well-cleaned property can become the subject of disagreement if there's no visual record.
The practical approach is simple. Do the broad clean room by room. Deep-clean the kitchen and bathrooms properly. Leave floors until last. Check outdoor areas before key return. Then document everything. When time is short, energy is gone, or the property has difficult areas like heavy oven build-up, carpet staining, mould, or high windows, bringing in professionals is often the cleaner and safer choice.
That's where Star Cleaner Australia fits naturally into the process. The service isn't just about getting someone in with a mop and vacuum. It's about reliable execution, safety-checked operators, and the reassurance of a 100% satisfaction guarantee. For renters, that means less uncertainty during one of the most stressful parts of moving. For property managers, it means a higher chance the property presents properly at handover.
No cleaning company can promise that every bond outcome is controlled by cleaning alone. Lease terms, damage, fair wear and tear, and maintenance issues all play a part. But a thorough clean combined with proper documentation puts the tenant in the strongest possible position. It shows care, preparation, and compliance with the standard expected at vacate.
A final handover should feel calm, not rushed. The best result comes from treating the checklist as a strategy, not a chore list. Clean what inspectors inspect. Photograph what matters. And if the property needs specialist attention, call professionals early enough to do the job properly. That approach gives the bond return the best possible support and makes the move to the next home much easier.
Need a dependable hand with an end-of-lease clean? Star Cleaner Australia Pty Ltd connects renters, property managers, and households with vetted, insured, safety-checked operators backed by a 100% satisfaction guarantee. Whether the job needs a full vacate clean, oven and carpet add-ons, or eco-friendly products from the shop, Star Cleaner Australia offers a reliable way to get the property inspection-ready without the usual guesswork.